The Split Account Codes option allows you to split account codes on one or multiple expense items. Use this option if the expense item total can be applied to different accounts within your company, such as a different division or department.
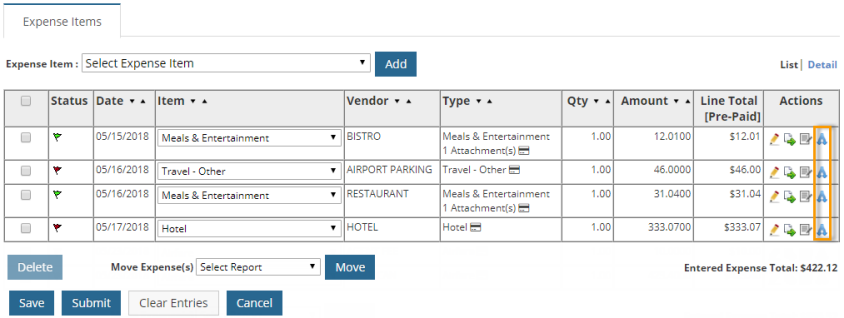
1. Locate an expense item, then click the Split Account Code icon ![]() .
.
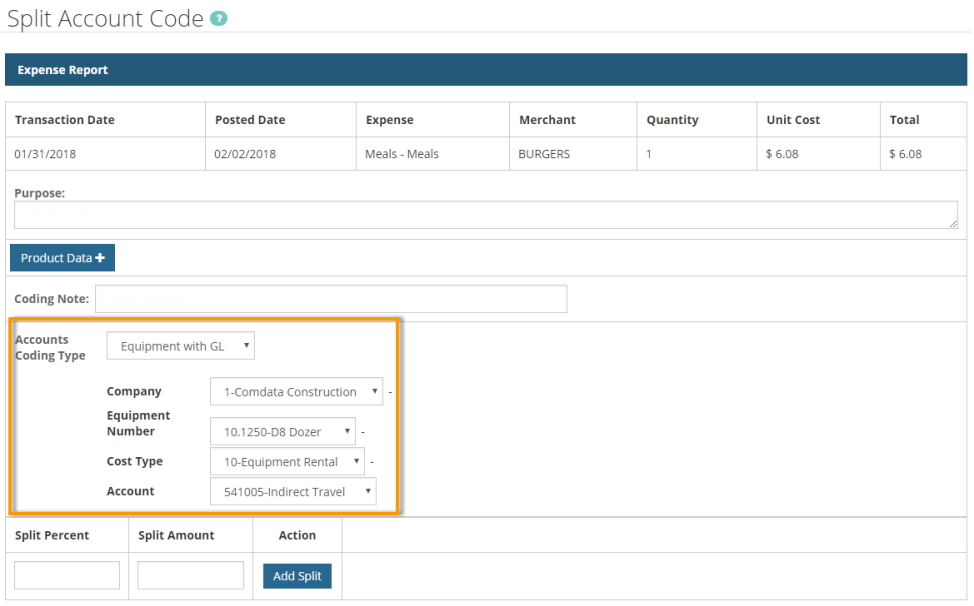
2. The Split Account Code page opens; use the account coding fields to modify the accounts coding values for the selected expense item.
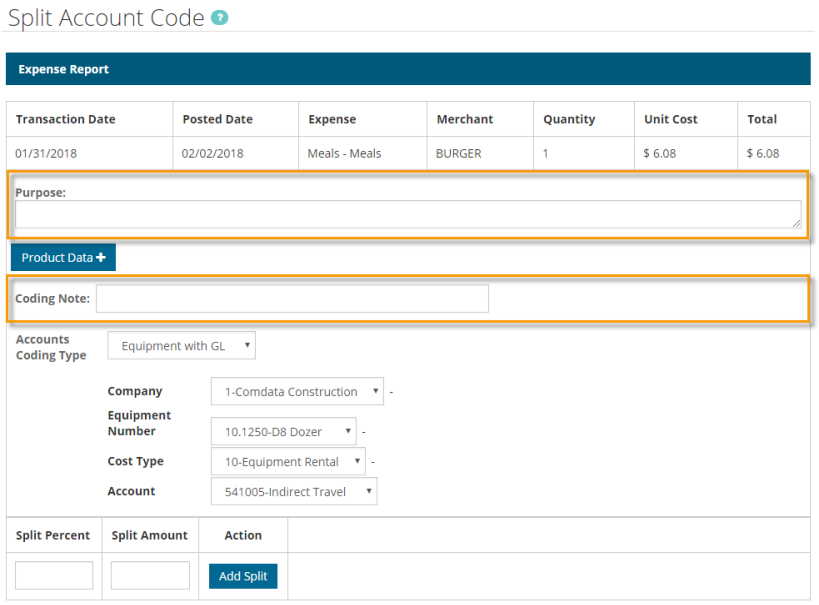
Use the Coding Note field to apply a note for each split on the expense item. If the split is added to multiple expense items, the coding notes will apply to each of those items as well. Both the Purpose field and Coding Note fields will be visible to the expense Approver.
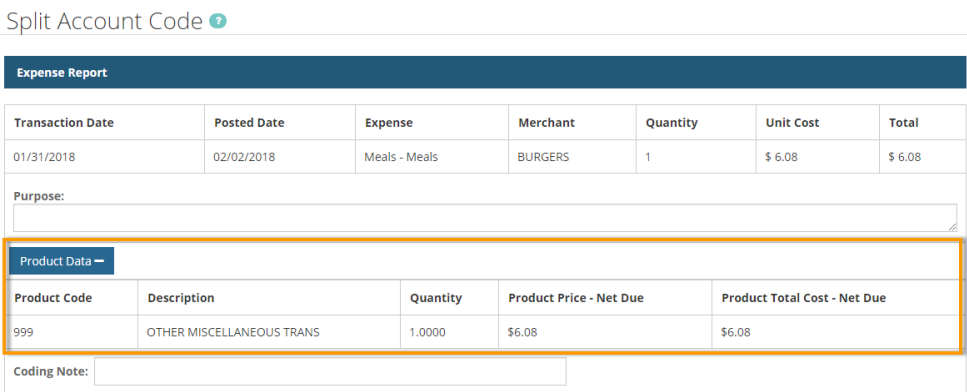
Also note, if the expense item is a credit card transaction, product-related details display on this page in the form of a drop-down. For example, in the image below, a Product Data drop-down displays to show details related to a miscellaneous transaction.
The naming of the drop-down is dependent on the merchant category code (MCC) assigned to the transaction. For example, if the transaction takes place at a hotel, a Hotel Data drop-down will appear.
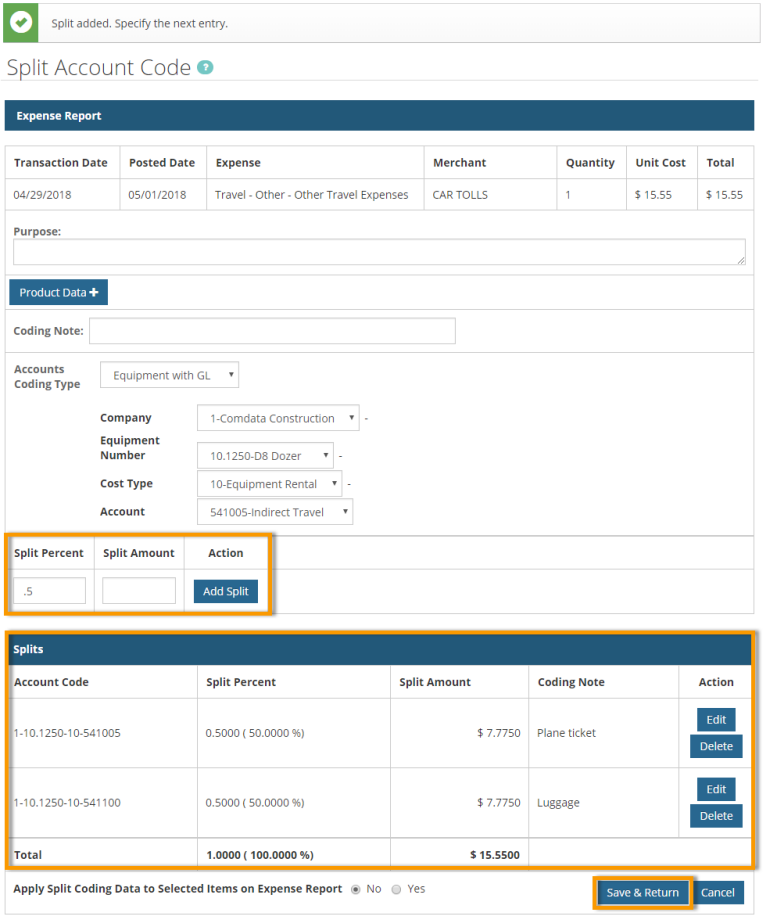
3. Add the split using either the Split Percent or Split Amount field. Enter a split value between 0 and 1 in the Split Percent field (for example, .5 for 50%). Enter the split value in dollars and cents or a whole number in the Split Amount field. Continue adding splits until the sum of all splits equal the total amount of the expense item.
4. Click Add Split when finished. To make changes to a split, click Edit. To remove a split, click Delete.
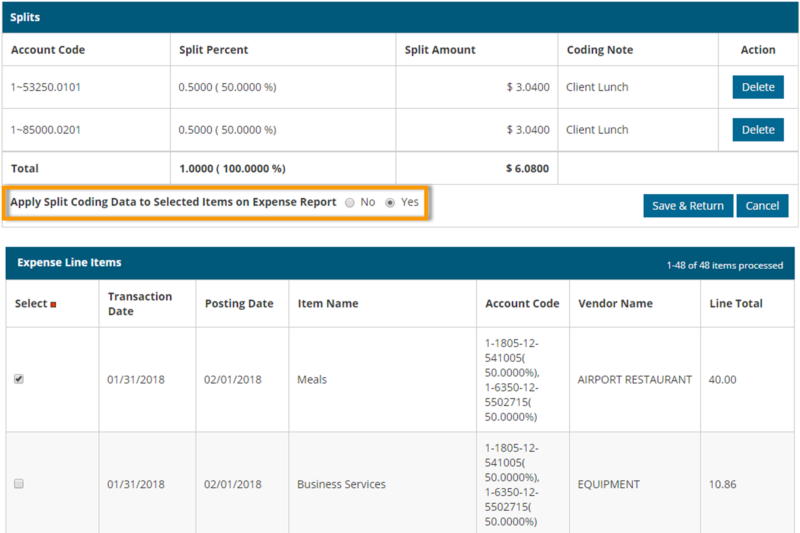
5. On the Apply Split Coding to Selected Items on Expense Report field, select the Yes radio button. This opens the expense items below for selection, which allows you to apply the splits to other expense items. For example, in the image below, the splits will apply to the Hotel expense item. Since this expense item is split down the middle (50/50), the Hotel expense item will be split down the middle as well.
6. Click Save & Return when finished.
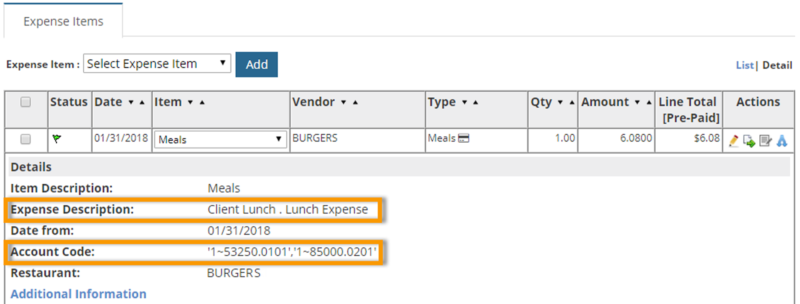
7. Return to the Expense Items table and change the view to Detail. You can see the note added in the Purpose field appears in the Expense Description line. Split account code values appear in the Account Code line separated by a comma. Any values entered in the Coding Note field will display in the Approver’s view of the expense report.
