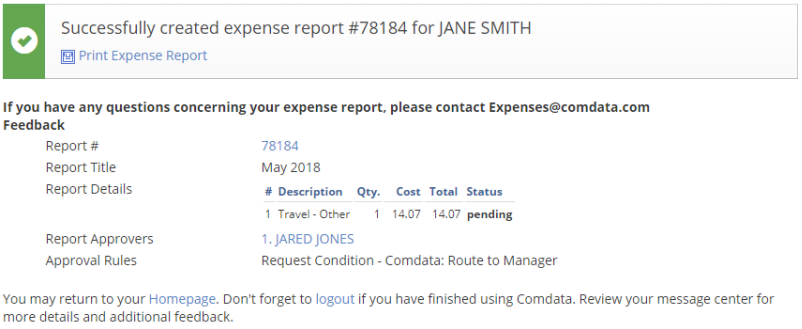
Follow the steps below to create and submit a reimbursable non-Comdata Mastercard expense report.
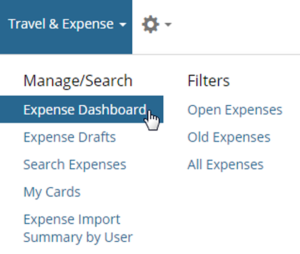
1. On the Expense Track main menu, select Travel & Expense > Expense Dashboard.
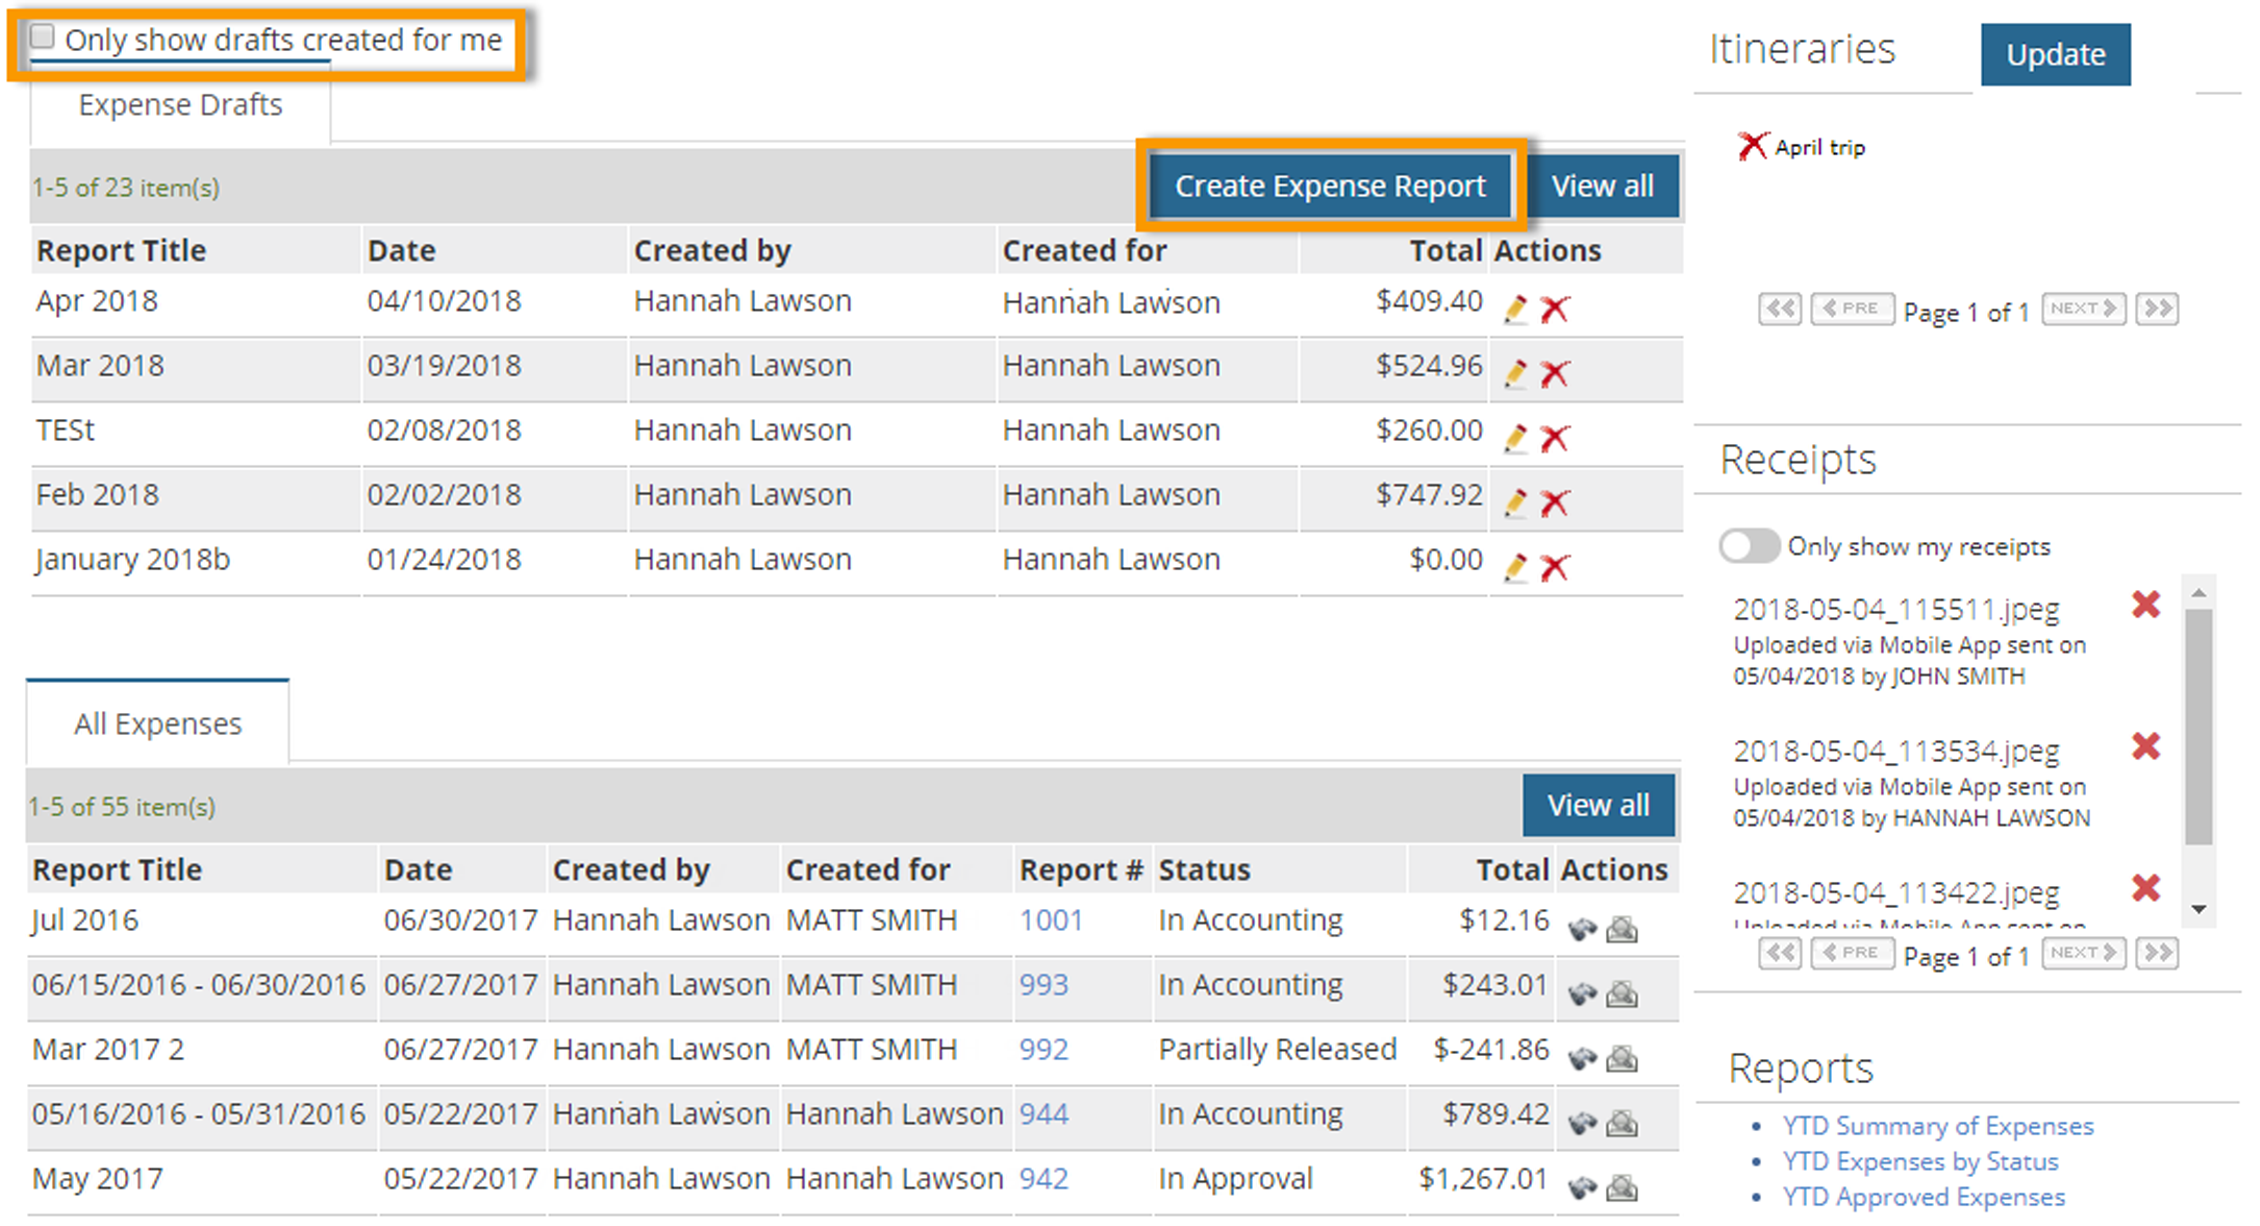
2. Click Create Expense Report.
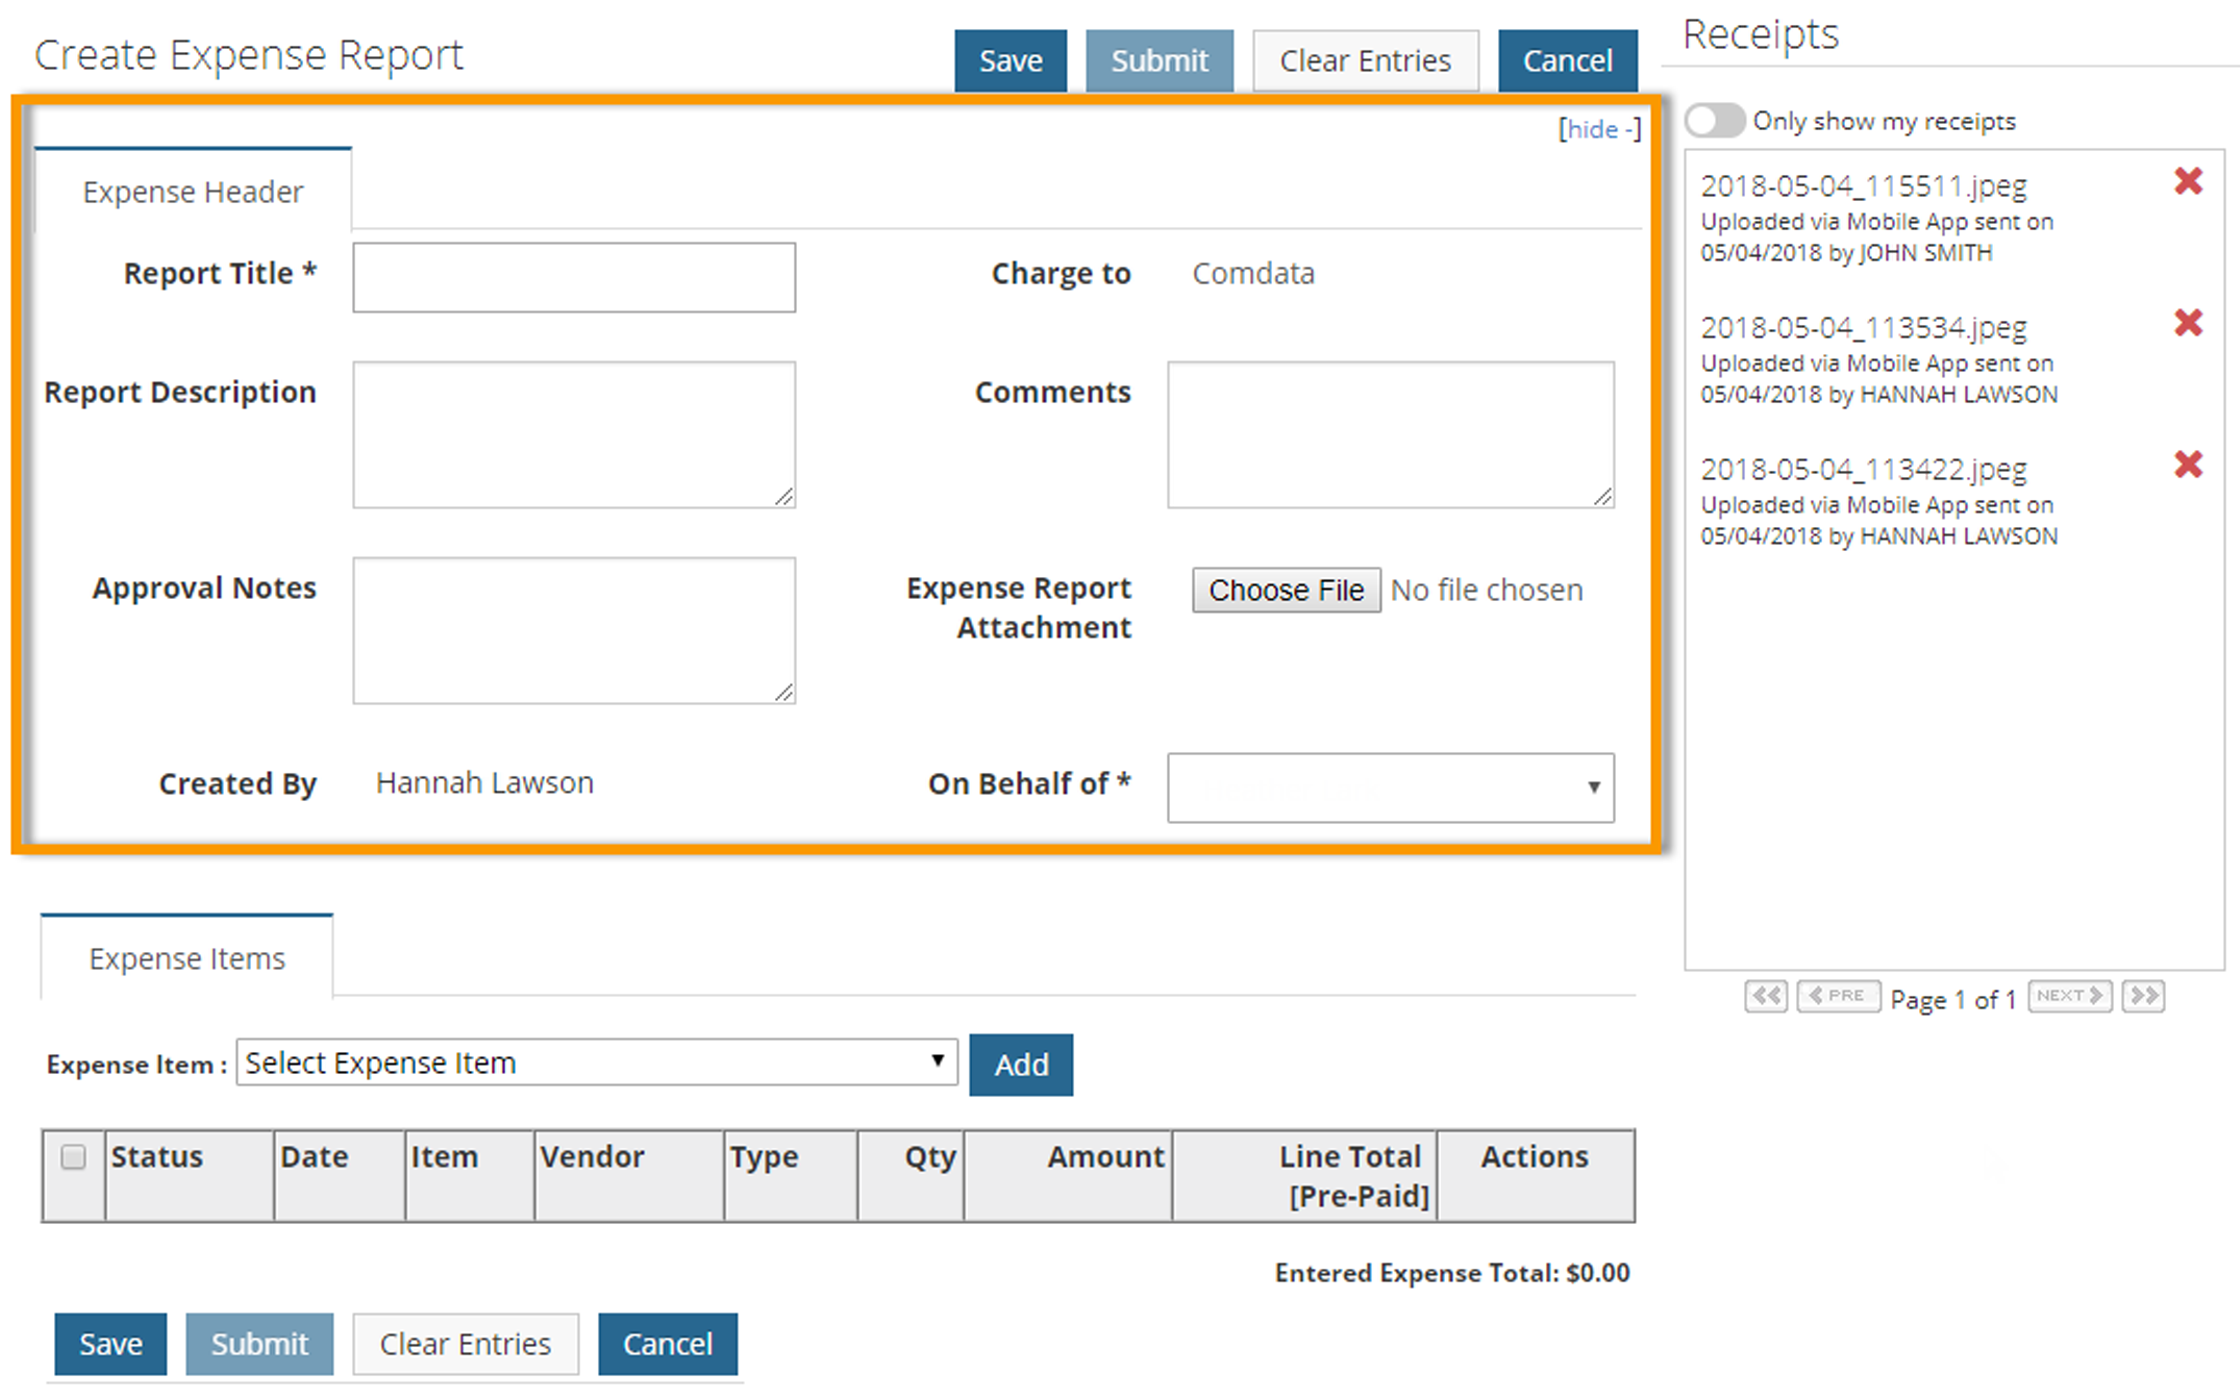
3. Under the Expense Header section, complete each field as necessary. Required fields are denoted by an asterisk. These fields set up the expense report’s header, such as the report’s title, description, comments, and any notes for the expense approver. Click Save when finished.
| Field | Description |
|---|---|
| Report To | The name of the expense report. This field must be completed before an expense item can be selected. |
| Charge To | Use the Look Up icon |
| Report Description | Enter a description to distinguish the report from other reports. |
| Comments | Enter any necessary comments about the expense report. |
| Approval Notes | Enter any notes the expense approver needs to review. |
| Expense Report Attachment | Select an attachment that is related to the expense report. This can be scanned receipts or other relatable documents.
Note: See Attach Receipts to an Expense Report for more information on attaching receipt images. |
4. Now that the expense report header is created, begin adding expense items. Select an item from the Expense Item drop-down. Then, click Add.

5. The fields on the Add/Edit Expense Item page vary extensively depending on the expense type configurations made by your Administrator. Complete all fields necessary to set up the expense item and then click Save. Required fields are denoted with an asterisk. Repeat this process to add as many expense items to the report as necessary.
Select the Remember data for next expense? checkbox to copy the information to the next expense item you create for this report.
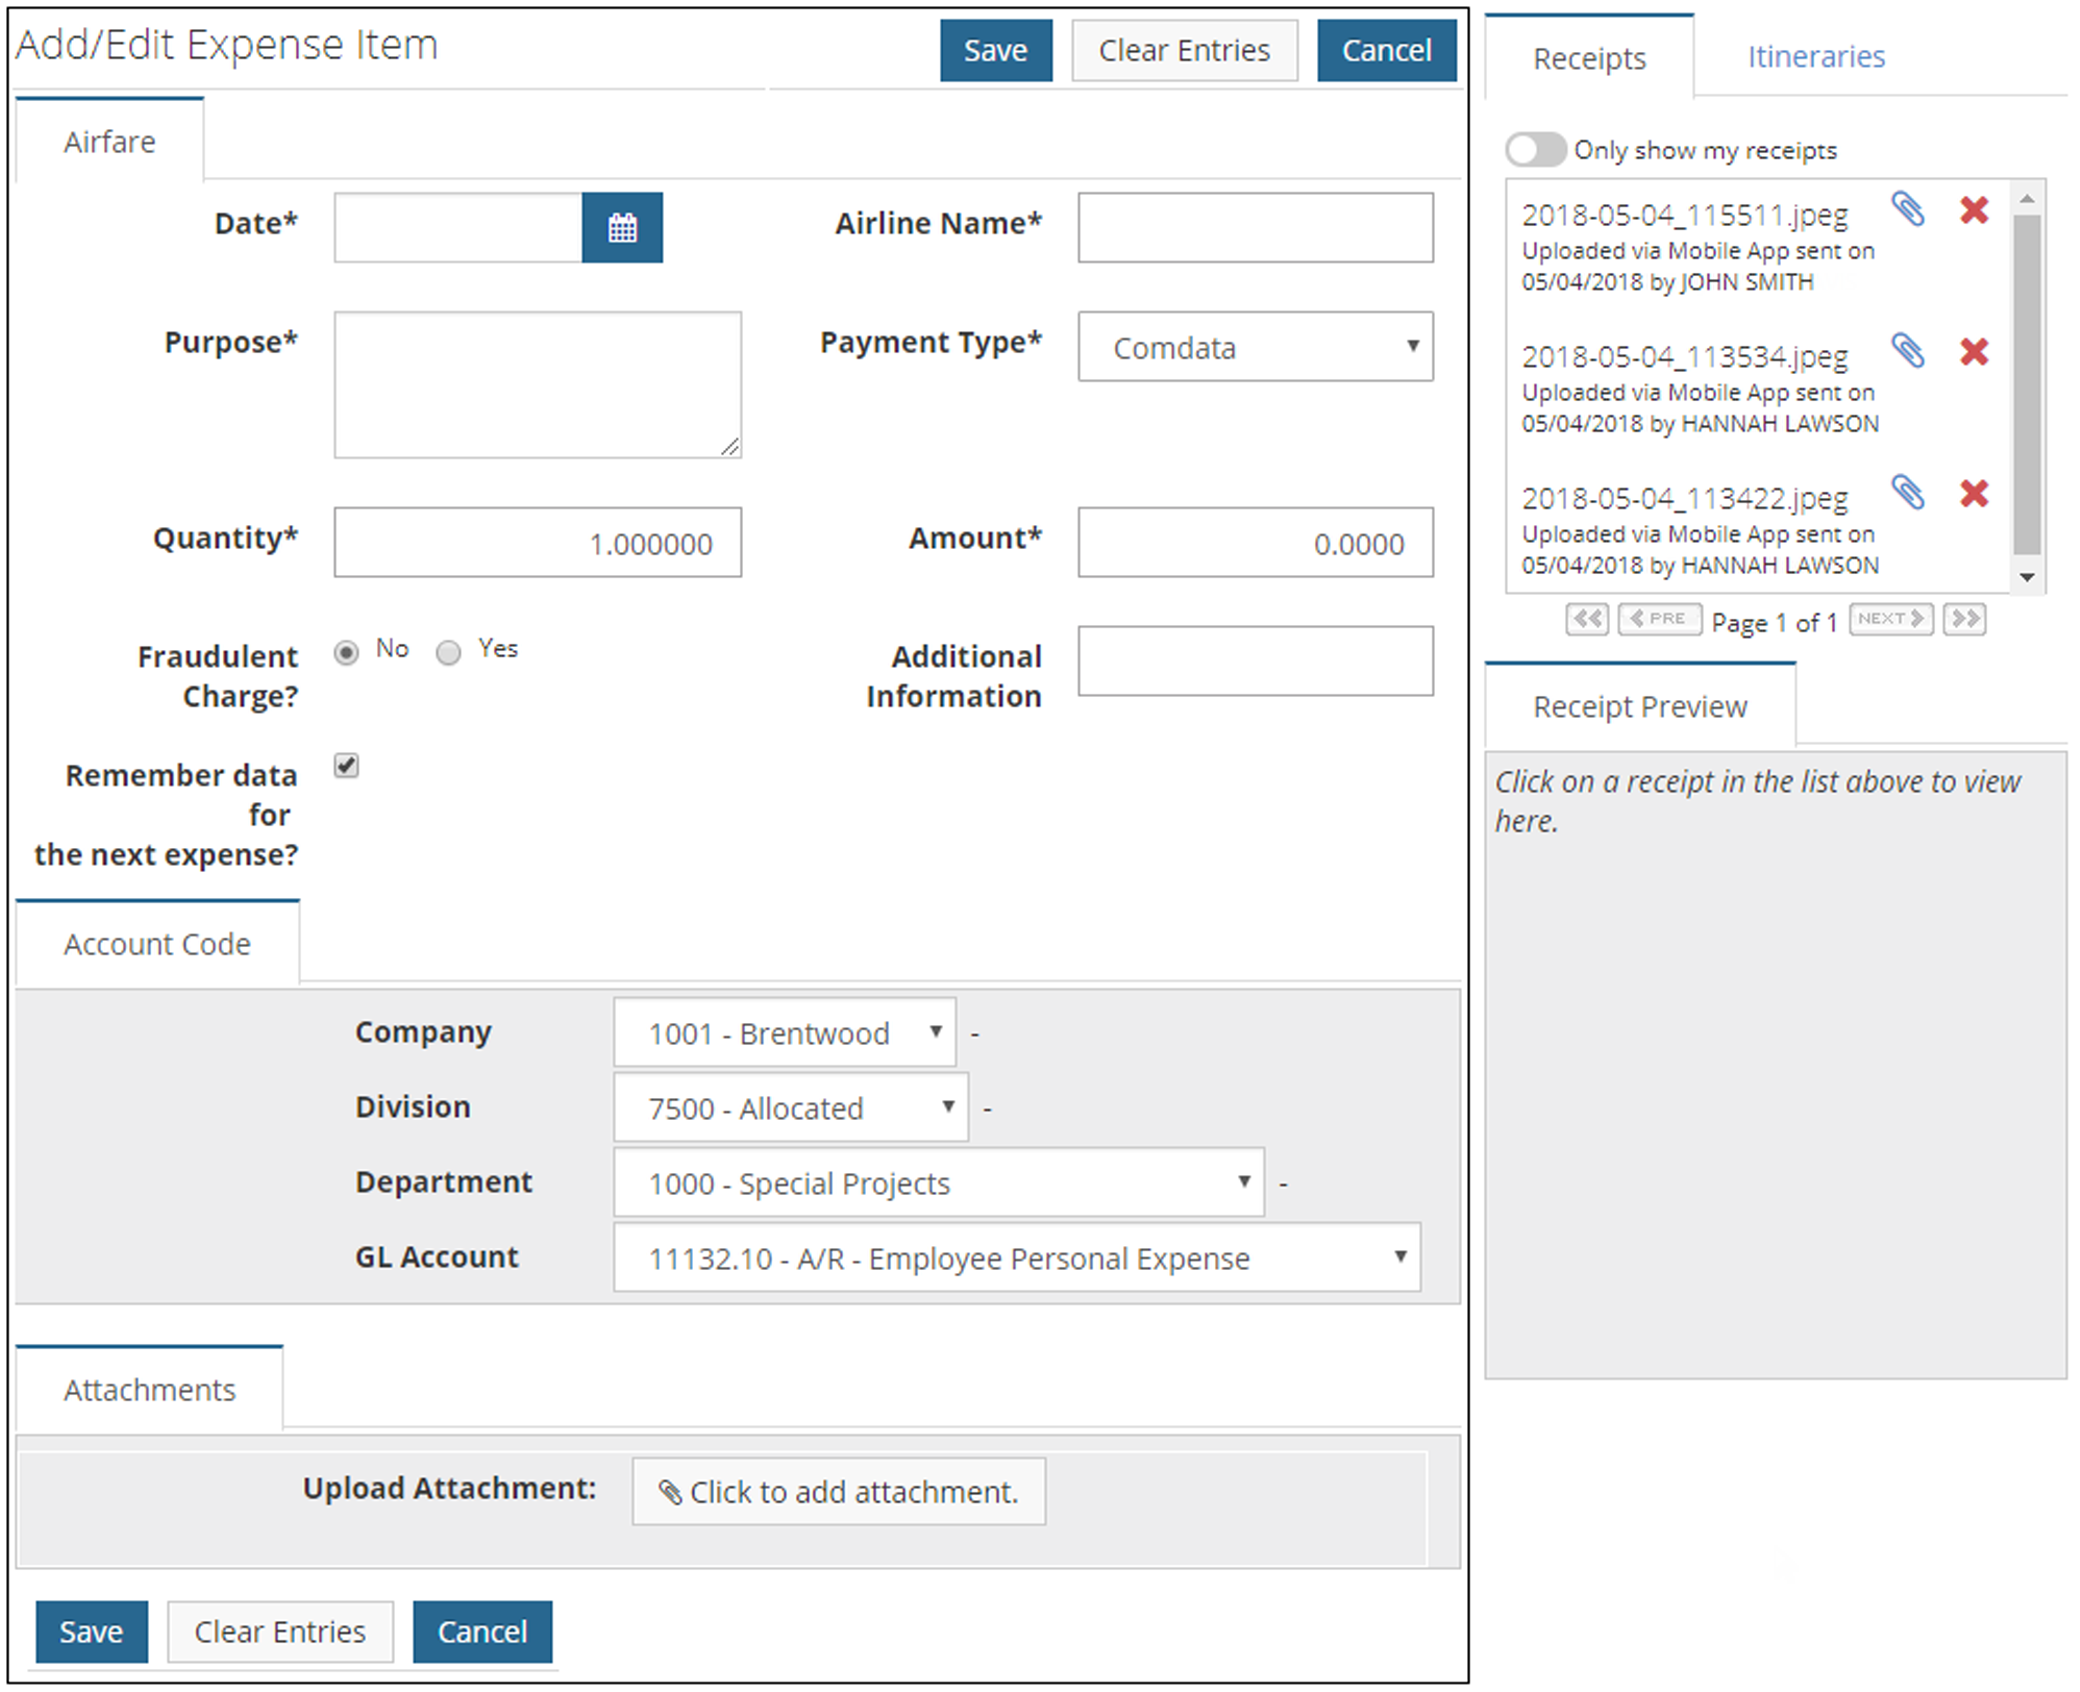
Note: The Account Code section displays fields for applying an account code structure to the expense item. These fields will default to values determined by your Administrator. This allows you to allocate the costs of the expense item to specific departments, projects, divisions, etc. within your company.
The account code structure must be applied correctly. If an incorrect value is selected, you cannot save the expense item. Be aware that field labels may display differently depending on your company’s account code structure and the Accounts Coding Type selected. Also note that these fields may be preselected if your Administrator added a default accounts coding type at the expense type or expense item level.
6. Each expense item you enter displays under the Expense Items header in a table. You may edit fields from this view, such as the Quantity and Amount, if enabled by your Administrator.
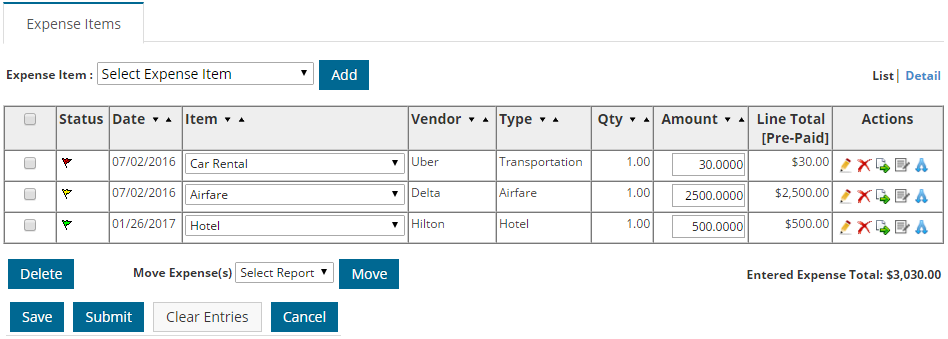
| Field | Description |
|---|---|
| Checkbox | Select the check box next to expense items you want to move to another report. Then, click Move. |
| Status |
|
| Date | Indicates the transaction date for both credit card and cash transactions. |
| Item | The name of the Expense Item. Use the Item drop-down to associate the transaction to a different expense item if necessary. |
| Vendor | The merchant where the expense occured. |
| Type | The associated expense type. |
| Quantity | The quantity that was purchased, if applicable. |
| Amount | The amount in dollars and cents that was purchased. |
| Line Total (Pre-Paid) | The total for the expense line item. |
| Actions | Each icon allows you to edit the expense items:
|
| List/Detail | The List/Detail buttons in the top right corner above the table allow you to display the items in a list view or detail view. The detail view provides additional information on the expense items such as the description, date, and account code. |
7. If all information on the expense report is accurate, click Submit to send it for approval. If successful, a summary page opens displaying all information on your expense report, including the report number, title, expense items, approvers, and approver rules. Each item will be in pending status until approved. Use the Print Expense Report option to view and/or print the expense report for record keeping, if requested by your Administrator.
