Use this section to learn how to approve expense reports on the Expense Track website. You can approve an entire report or each specific expense item in a report.
1. There are two ways to access expense reports for approval from the Expense Track main menu:
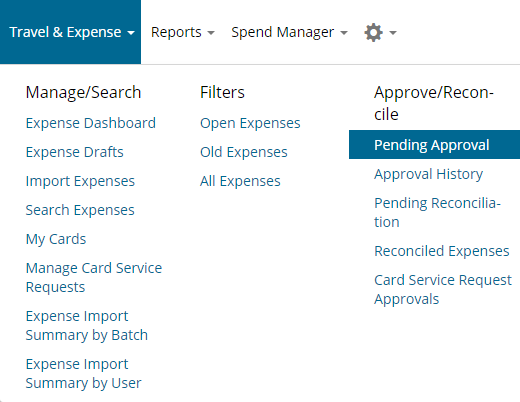
- Select Travel & Expense > Pending Approval in the main menu.
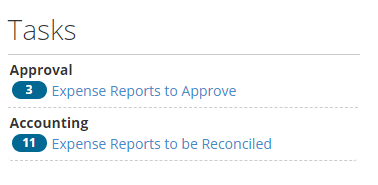
- Or, under the Tasks section on the home page, click Expense Reports to Approve.
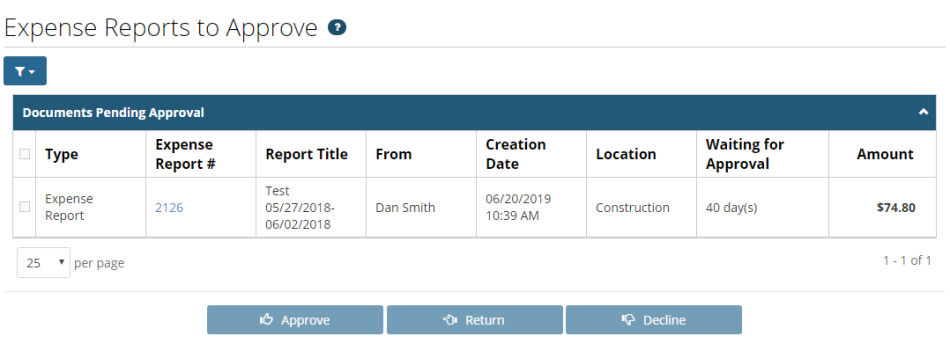
2. On the Expense Reports to Approve page, click an Expense Report # from the Documents Pending Approval list. If you have a large list of reports, use the Filter ![]() option at the top of the page to quickly locate a report.
option at the top of the page to quickly locate a report.

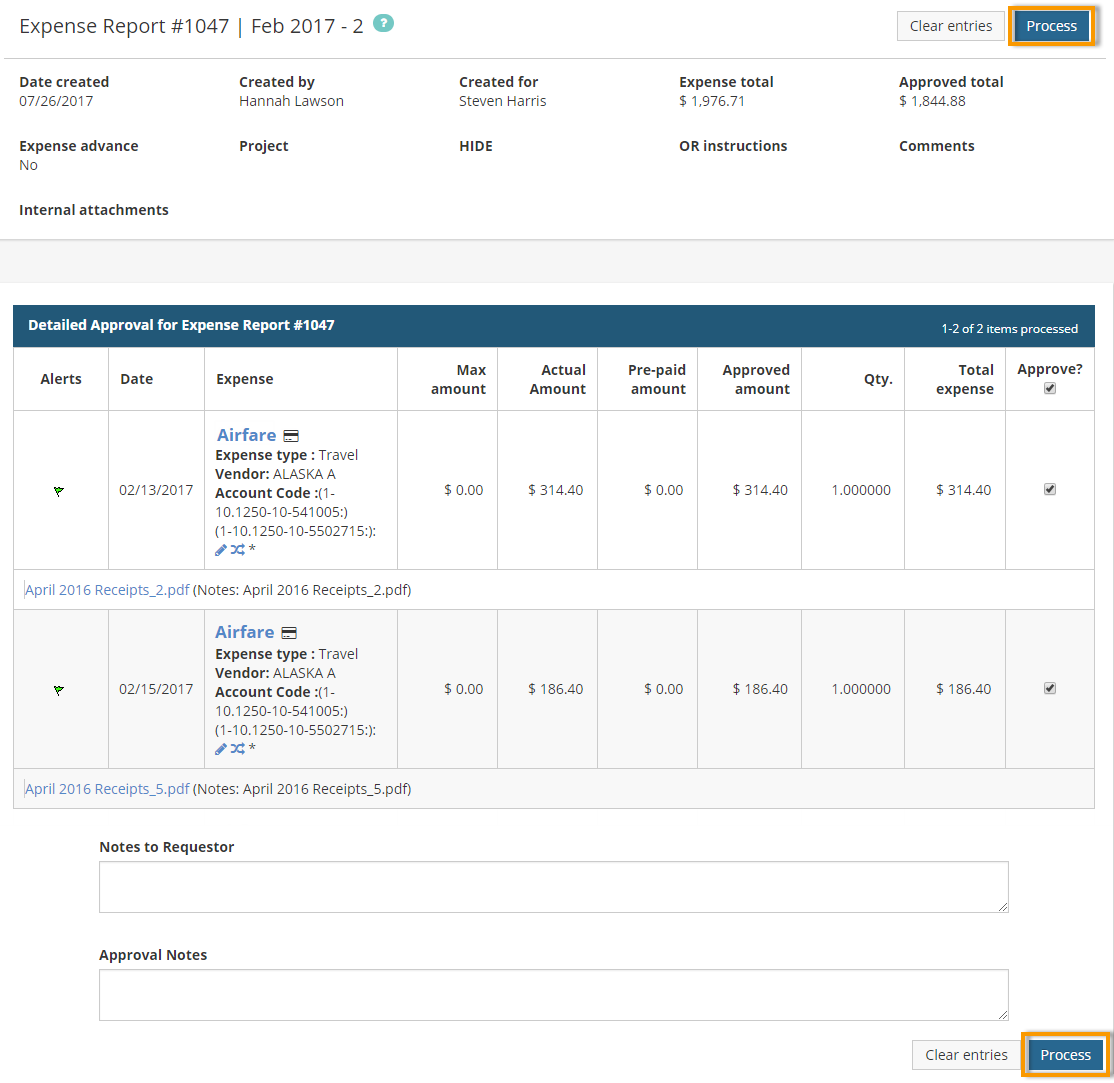
3. The Expense Report Approval page opens. Review each detail on the expense report, including each expense item. This page provides a detailed view of the expense report items. A brief overview of the report is given at the top of the page, followed by a list of all expense items, and ending with the Notes, FYI Notifications, and Edit Approval Routing sections. Review each detail on the expense report, including each expense item.
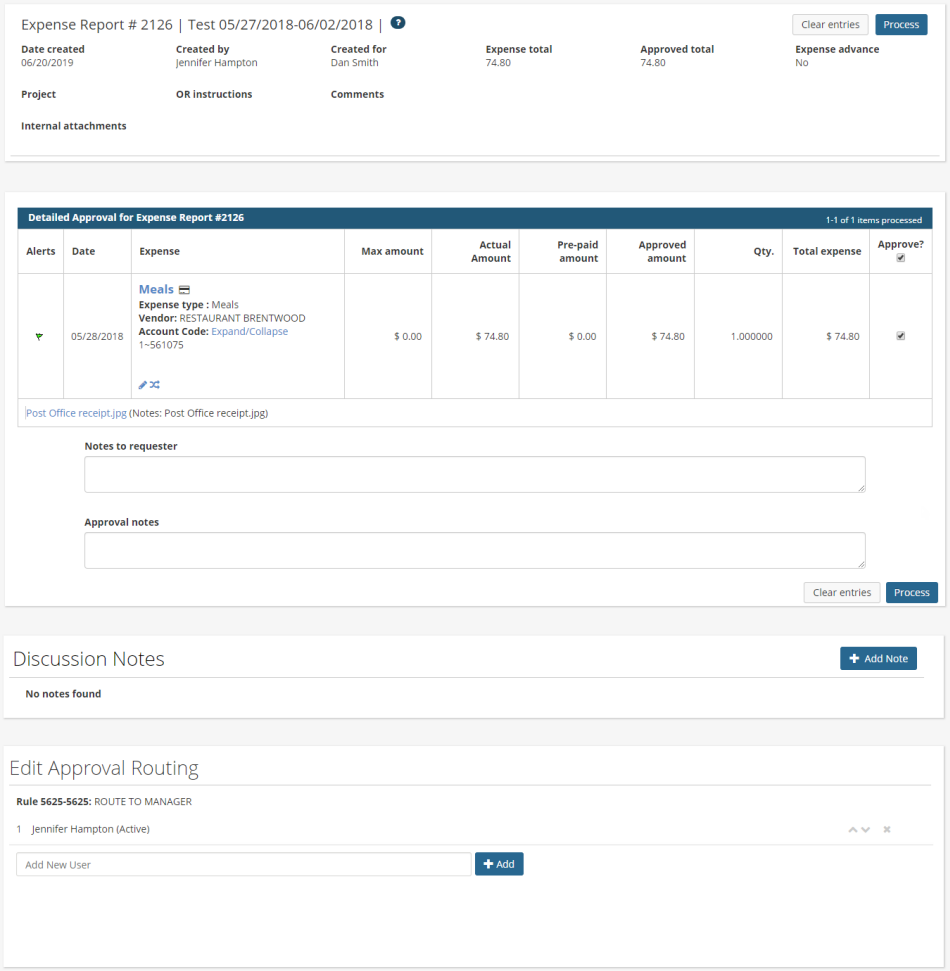
The top portion of the page provides a high level description of the expense report, including details such as the create date, total amount, and approved amount.

4. Under the Detailed Approval for Expense Report section, review each expense item.
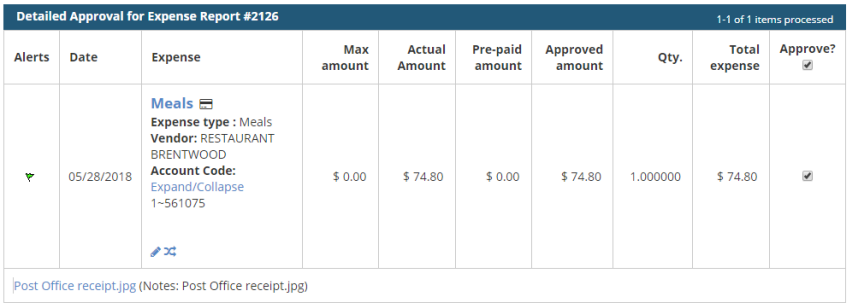
- To approve only an expense item, select the checkbox for each item under the Approve? column. Declined items should remain unselected; if you have declined expense items, you can still process the report, but those declined items will not be processed for approval. Select the checkbox under Approve? to select all of the expense items in the list for approval.
Note:
- If you decline an expense item, all details on the item will remain, such as any attached receipts, notes, and accounts coding information.
- The Alerts column identifies the status of the expense item: green flag – item is ready for approval, yellow flag – item is not in compliance but can still be approved.
- The Approved Amount and Quantity columns may be open for editing, but you cannot edit these columns for Comdata Mastercard transactions.
- To edit or split the coding of an expense item, click on the edit
 icon or split
  icon.
icon.
- Any attached receipts can be viewed from this page by selecting the PDF attachment link immediately under the item’s details.
- If applied by your Administrator, an Expand/Collapse button may display by the Account Code field. Click this button to view the entire account code and descriptions of each segment.
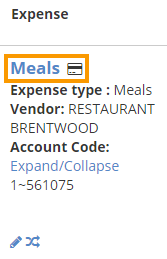
- For detailed information on each expense item, click the item name under the Expense column. This action opens the Expense Item Approval page.
The Expense Item Approval page allows you to view each expense item’s details, such as accounts coding splits, itemizations, credit card data, and receipts all in one screen.
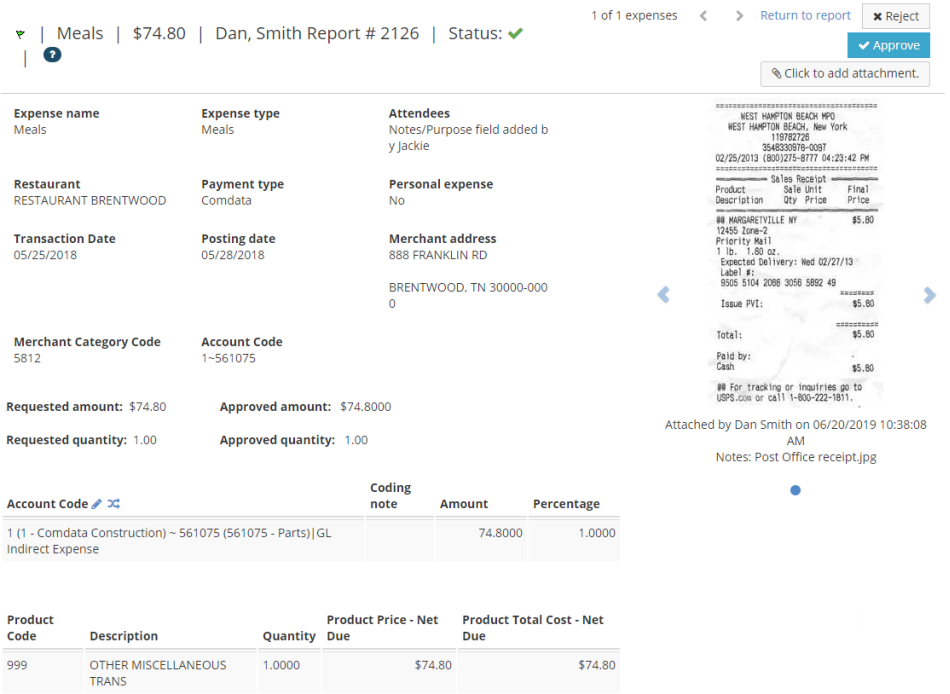
To edit or split accounts coding, click on the edit ![]() or split
or split ![]() icon. When a split is applied, it will appear under the HIDE section and the edit icon will disappear.
icon. When a split is applied, it will appear under the HIDE section and the edit icon will disappear.

View and scroll through receipts as images on the right side of the page and download and print them as needed. You can also attach receipt images if one is missing by using the Click to Add Attachment button. If the attachment is not an image or PDF, a download icon will display.
Once all information has been verified, you can reject or approve the item by selecting the Reject or Approve buttons located on the top right side of the page. You can also on move to the previous or next expense item by clicking on the left and right ![]() arrows at the top of the page, as well as returning to the expense report by clicking Return to report.
arrows at the top of the page, as well as returning to the expense report by clicking Return to report.
5. Back on the Expense Report Approval page, scroll down to the Note to Requestor and Approval Notes fields below the Detailed Approval for Expense Report section.
Use the Note to Requestor field to enter information for the user that submitted the report. Your notes will be sent to the user through the Messages feature and/or email after saving. For example, if you change the reimbursement amount, you can alert the user through the requestor notes. Use the Approval Notes field to enter a note for multiple approvers involved in the approval process. When a note is added, other approvers in the route can view the notes entered in the field.

6. The bottom of the Expense Report Approval page holds the Discussion Notes, FYI Notifications, and Approval Routing sections.

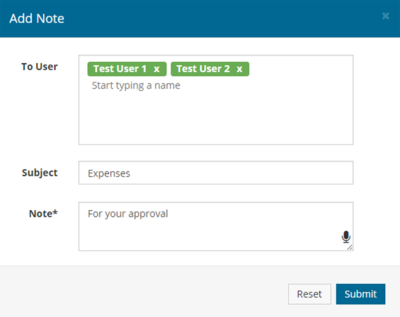
Notes: Use the Discussion Notes section to enter notes on the expense report for other users to view. For example, if multiple people need to approve the expense report, you can send a note to other approvers in the route to inform them on something related to the report. Each user will immediately see the note and be able to reply to it by clicking the Reply button ![]() . Click Add Note to start.
. Click Add Note to start.

Enter the user’s name, subject line, and note. Click Submit when finished, which will generate an internal message that will notify all included users of your note. Add as many notes as necessary.
FYI: Use the FYI Notifications to send notifications to specific users. These notifications are beneficial when other users need to be informed about an expense report, but do not need to approve it. To add a user for FYI notifications:
- Click inside the Add New User field.
- Enter a name in the field and select the username that appears in the search result, then click Add.
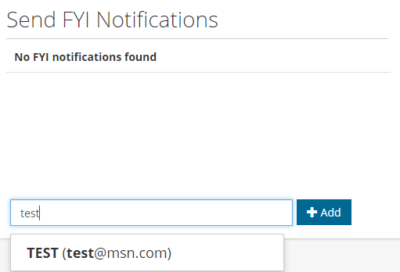
- The user will be added to receive an FYI notification. Add as many users as necessary.
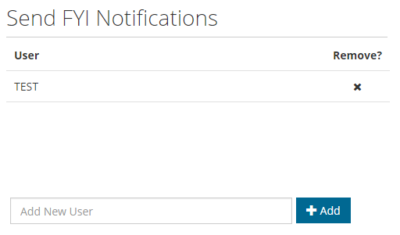
- To delete a user, click the
 under Remove? A dialogue box will display to confirm you want to delete the user. Click OK to confirm.

Approval Routing: Use the Approval Routing section to view each user in the approval route. A user with the word “active” next to their name is the current approver. The user with the word “open” next to their name needs to approve the report. A user with the word “closed” next to their name has approved the report. When adding users to the approver route, note the following:
- A new approver can only be inserted after the current active approver.
- The current approver or any previous approver cannot be moved up or down.
- Only the user who added the approver can delete the added approver.
- When there are multiple rules in effect, the selection of the approver under the rule determines where the approver should go in the rule chain.
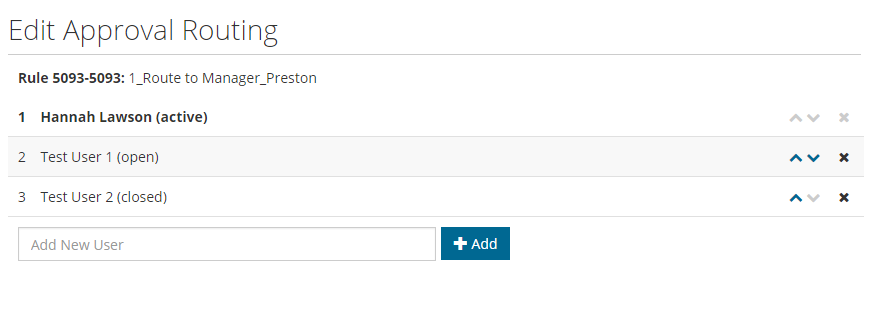
To add a user to the approval route:
- Click inside the Add New User field.
- Enter a name in the field and select the username that appears in the search result, then click Add.
- The user will be added to the routing. To change the order of the routing, the up and down arrows
 . The user at the top of the list is first in line to approve.

7. Return to the Expense Report Approval page and ensure everything is accurate. If so, click Process either at the top of the page or below Approval Notes.
8. You will be prompted to confirm your action. Click Submit to process the report.
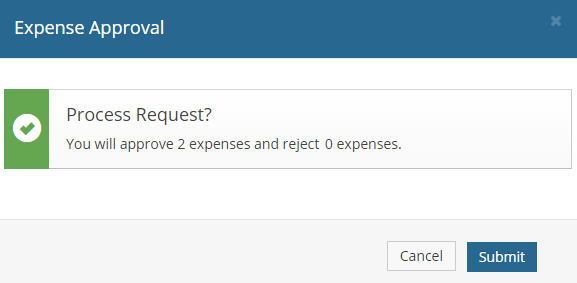
9. A message displays confirming that the expense report has been approved, including all approved expense items, and you are returned to the Expense Reports to Approve page.
