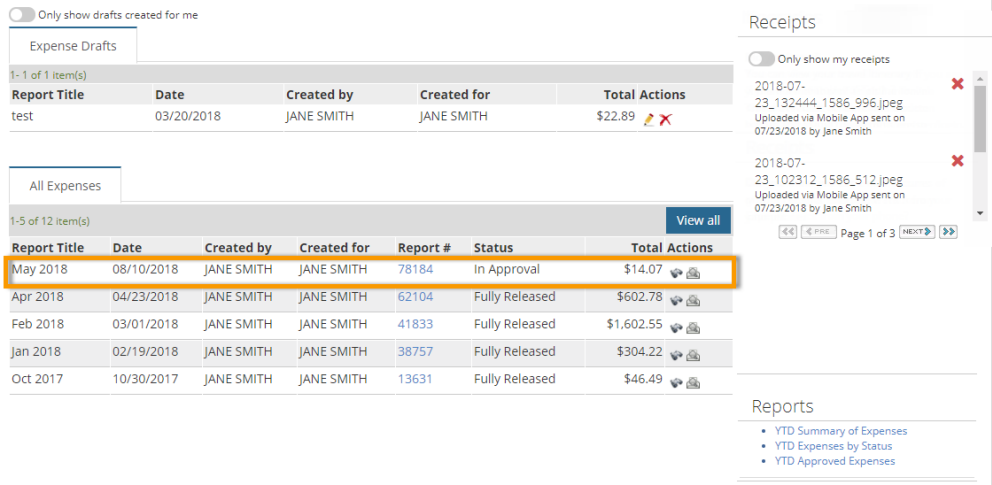
When a draft expense report is auto-generated with your transactions, you will need to review it for accuracy before submitting the report to avoid errors.
1. On the Expense Track main menu, select Travel & Expense > Expense Dashboard.
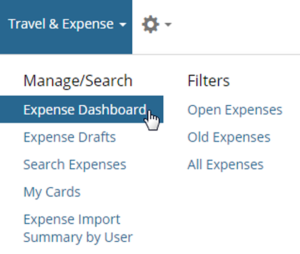
Alternatively, click the Quick Access Carousel on the home page to open a list of all your draft expense reports. Select a draft from the Expense Drafts drop-down and click Go.

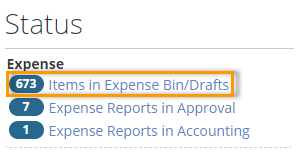
Or, click Items in Expense Bin/Drafts under the Status section on the home page.
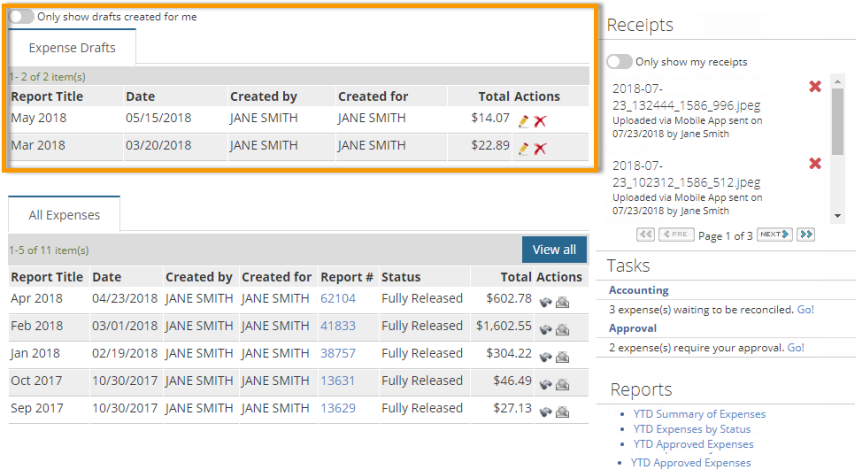
2. The Expense Dashboard lists all of your auto-generated draft expense reports. Click the edit icon ![]() to view a report’s details.
to view a report’s details.
| Field | Description |
|---|---|
| Only show drafts created for me | If you have Delegate users, use the Created by and Created for columns to see who created reimbursable draft expense reports for you. To display only your own expense reports, select the Only show drafts created for me toggle button. |
| Expense Drafts | A list of all your draft expense reports that have not been submitted for approval. |
| All Expenses | A complete list of all expense reports you have submitted for approval and/or reconciliation. You cannot edit these reports, but you can review them. These reports can be in one of four statuses:
|
| Receipts | The Receipts queue displays all receipt images that are not attached to a transaction. If you are a Delegate user, your Delegator users’ receipts will display with your own. Use the Only show my receipts button to toggle the view to display only the receipts you uploaded. Your setting on the Only Show My Receipts button will remain applied for every page where the Receipts queue displays. See Attach Receipts Images to an Expense for more information. |
| Tasks | If you have approval privileges, this section displays a list of all of your approval tasks that require action, such as approving a submitted expense report. |
| Reports | If you are granted access, the Reports section displays a list of reports on your expense activity. These include YTD (year to date) Summary of Expenses, YTD Expenses by Status, YTD Approved Expenses. Click a report to view its details. |

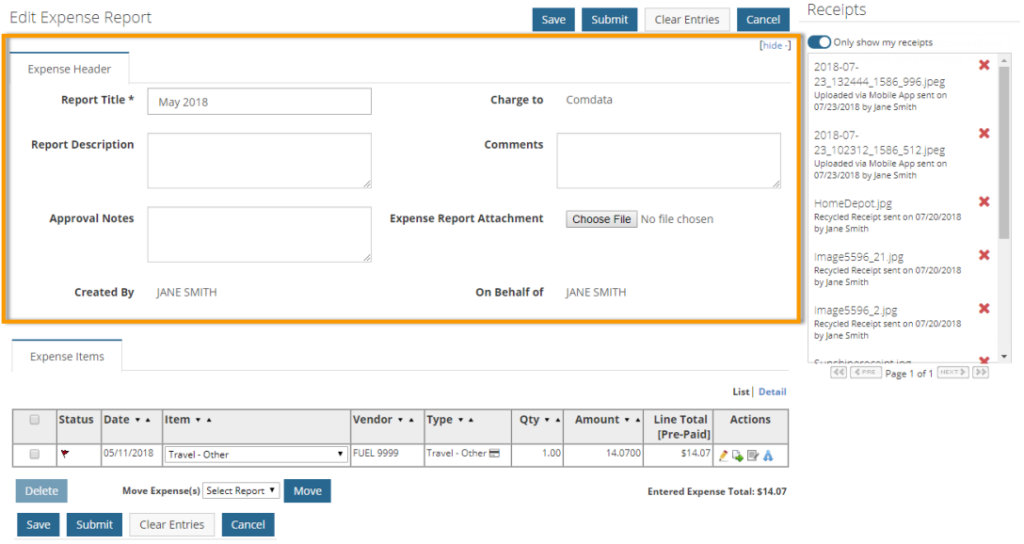
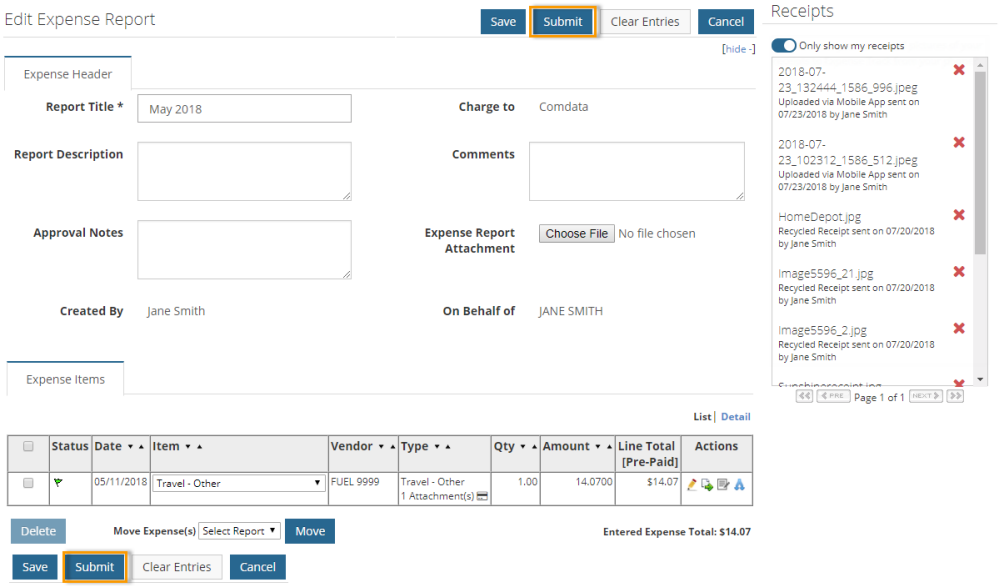
3. Each expense report contains a header section with basic details on the report and an expense item section that includes all of your transactions. Edit the header if needed, such as entering a report description or notes for the expense approver to review.
| Field | Description |
|---|---|
| Report Title | The name of the expense report. This field will populate for you. |
| Charge to | The location where the expenses are being charged. |
| Report Description | Enter a description to distinguish the report from other reports. |
| Comments | Enter any necessary comments about the expense report. |
| Approval Notes | Enter any notes the expense approver needs to review. |
| Expense Report Attachment | Select an attachment that is related to the expense report. This can be scanned receipts or other relatable documents. |
| Receipts | Displays all receipt images uploaded through the Expense Track mobile app or manually through the website. Click a receipt to view its image. See Attach Receipt Images to an Expense for more information. |
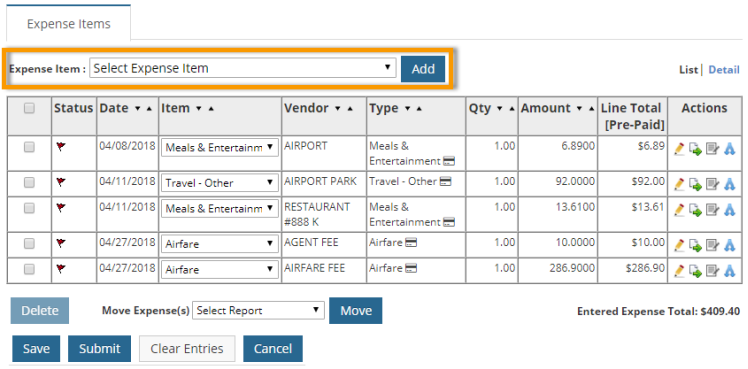
4. The Expense Items table holds each of your transactions as identified by the credit card icon ![]() . If the transaction is in red flag status
. If the transaction is in red flag status ![]() , it cannot be submitted for approval and means a correction is required. The reason for a red flag status can range from incorrect account codes to missing receipt images, but it is dependent on your Administrator’s configurations.
, it cannot be submitted for approval and means a correction is required. The reason for a red flag status can range from incorrect account codes to missing receipt images, but it is dependent on your Administrator’s configurations.
Click the edit icon ![]() to view the transaction’s details.
to view the transaction’s details.

| Field | Description |
|---|---|
| Status |
|
| Date | Indicates the transaction date. |
| Item | Used to match the transaction to another expense item if needed. |
| Vendor | The merchant where the expense occured. |
| Type | The associated expense type. |
| Quantity | The quantity that was purchased, if applicable. |
| Amount | The amount in dollars and cents that was purchased. |
| Line Total (Pre-Paid) | The total for the expense line item. |
| Actions | Each icon allows you to edit the transaction:
|
| List/Detail | The List/Detail buttons in the top right corner allows you to display the Expense Items section in its default view as a table (List) or a detailed view (Details). |
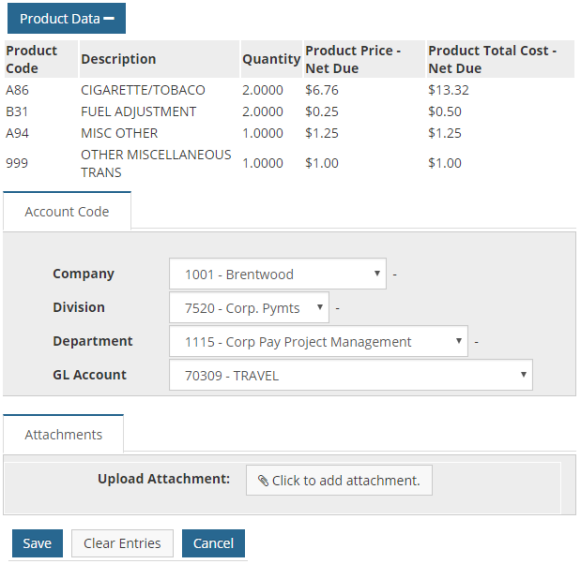
5. The Add/Edit Expense Item page displays all details on the transaction. The fields on this page are dependent on the expense type selected and configurations made by your Administrator. Required fields are denoted with an asterisk. Complete fields as necessary and click Save when finished.
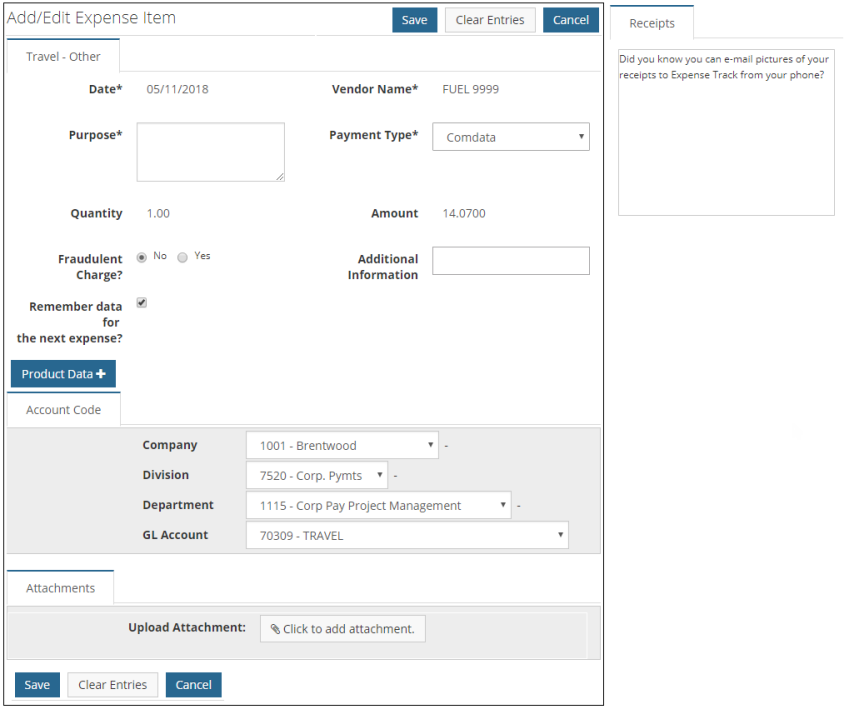
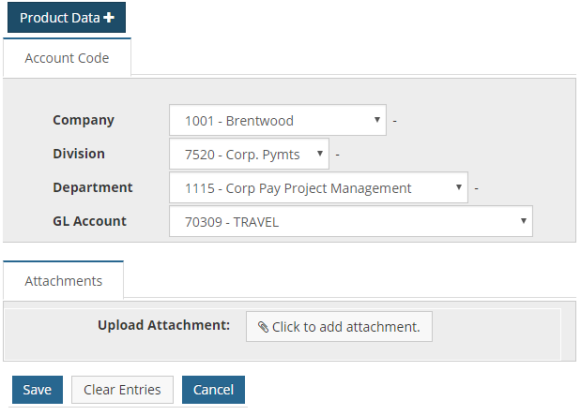
Note: The Account Code section is required and displays fields for applying an account code structure to the transaction. Account codes allow you to allocate the costs of the transaction to specific entities within your company. These fields will prepopulate for Comdata Mastercard transactions. However, review the account code structure to ensure it is applied correctly. If you do not know the appropriate account code structure for a transaction, contact your administrator.
In addition, your administrator may require you to attach a receipt image to the transaction before it can be submitted for approval. Use the Click to add attachment button to do so. See Attach Receipts to an Expense for more information.
6. Once you click Save on the Add/Edit Expense Item page, you are returned to the Expense Report page. Ensure all expense items have a green flag status. If so, click Submit to send it for approval.
7. A summary page displays with details on the expense report, including the report number, title, expense items, approvers, and approver rules. You will receive a notification in your Expense Track Messages once your expense approver takes action on the report.
Click the Print Expense Report button to print the report for record-keeping.
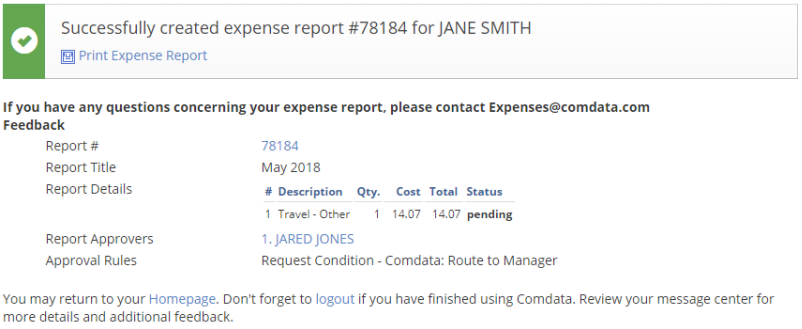
You can also track the status of your submitted expense report on the Expense Dashboard.
